Masterbuilt digital electric smokers offer a convenient way to achieve delicious smoked foods. These smokers utilize electricity for consistent heat‚ making them user-friendly and efficient.
Brief Overview of Electric Smokers
Electric smokers have gained immense popularity due to their ease of use and consistent results. Unlike traditional charcoal or wood smokers‚ they utilize an electric heating element to generate heat. This eliminates the need to constantly monitor fuel levels and adjust dampers for temperature control. Digital electric smokers‚ like those from Masterbuilt‚ often feature precise digital control panels‚ allowing users to set specific temperatures and cook times with ease. This level of control makes them ideal for both novice and experienced smokers. Electric smokers also tend to be more compact and portable than their traditional counterparts‚ making them suitable for various outdoor spaces. Additionally‚ they produce less smoke and are generally more environmentally friendly. The convenience and consistency offered by electric smokers have made them a preferred choice for many home cooks looking to enjoy delicious smoked foods without the hassle of traditional methods. Their ability to maintain stable temperatures is a key advantage.
Importance of the User Manual
The user manual for your Masterbuilt digital electric smoker is an essential resource‚ often overlooked but incredibly vital for optimal performance and safety. It provides detailed instructions on every aspect of your smoker‚ from initial setup and assembly to operation‚ maintenance‚ and troubleshooting. Ignoring the manual can lead to improper use‚ which can result in poor cooking results‚ potential safety hazards‚ or even damage to the smoker. The manual outlines specific safety precautions that must be followed to prevent accidents and ensure the longevity of your equipment. It also contains valuable information on how to properly season your smoker before its first use‚ a crucial step for achieving consistent and flavorful results. Furthermore‚ the manual details the functions of each component‚ how to use the digital control panel‚ and how to properly add wood chips for optimal smoke production. By thoroughly reading and understanding the user manual‚ you can confidently and safely operate your smoker‚ achieving consistently delicious smoked foods while prolonging the life of your equipment. It’s the key to unlocking your smoker’s full potential.

Understanding Your Masterbuilt Smoker
Familiarizing yourself with your Masterbuilt smoker is crucial for safe and effective use. Knowing its parts and their functions will improve your cooking experience.
Key Components and Their Functions
Your Masterbuilt digital electric smoker comprises several essential components‚ each playing a vital role in the smoking process. The digital control panel allows you to set and monitor the cooking temperature and time‚ providing precise control over your smoking session. The heating element generates the heat necessary to cook your food‚ while the wood chip tray holds the wood chips‚ which produce the flavorful smoke. The water pan‚ when filled with water or other liquids‚ adds moisture to the cooking environment‚ preventing your food from drying out. The cooking grates provide a surface to hold the food during smoking‚ and the grease tray collects excess grease and drippings. The temperature probe‚ if included‚ allows you to monitor the internal temperature of the meat. Understanding the functions of these components will enable you to operate your smoker effectively and achieve the best possible results.
Safety Precautions Before Use
Before operating your Masterbuilt electric smoker‚ it’s crucial to prioritize safety. Always ensure the smoker is placed on a stable‚ non-flammable surface‚ away from any combustible materials like wood or dry grass. Never use the smoker indoors‚ in enclosed spaces‚ or under awnings; always use it in well-ventilated outdoor areas. Inspect the power cord for any damage before each use‚ and avoid using extension cords. Keep children and pets at a safe distance while the smoker is in operation‚ as the exterior surfaces can become extremely hot. It is also important to allow the smoker to cool completely before cleaning or attempting any maintenance. Always consult the manual for detailed safety guidelines‚ and never leave the smoker unattended during operation. Following these precautions will help prevent accidents and ensure safe operation.

Initial Setup and Preparation
Proper setup is essential for optimal performance. This includes assembling all parts correctly and seasoning the smoker before its first use to ensure even cooking.
Assembling Your Smoker
Before you embark on your smoking journey‚ carefully unpack all components of your Masterbuilt digital electric smoker. Refer to the included parts list to ensure everything is accounted for. Begin by attaching the legs to the main body of the smoker‚ using the provided screws or bolts. Make sure they are securely fastened to provide a stable base. Next‚ install the side handles‚ if applicable‚ which will aid in moving the smoker. Place the water pan and wood chip tray inside the smoker‚ ensuring they sit properly on their designated supports. If your model has a grease management system‚ install it according to the instructions; Finally‚ connect the digital control panel to the smoker‚ making sure all wiring is properly attached and secure. Double-check all connections to guarantee a safe and effective setup before proceeding. This thorough assembly will ensure your smoker functions optimally and safely.
Seasoning the Smoker for First Use
Seasoning your new Masterbuilt smoker is crucial for removing any manufacturing residues and preparing it for optimal performance. Begin by lightly coating the interior surfaces‚ including racks‚ with cooking oil that has a high smoke point. Ensure the oil is evenly distributed. Next‚ set the digital control panel to a temperature of 275°F (135°C). Allow the smoker to run for approximately three hours. This heating process will burn off any oils and chemicals left over from production‚ while also helping to create a protective layer inside the smoker. Monitor the smoker during the seasoning process and be aware of any unusual odors or smoke. After the three hours‚ allow the smoker to cool completely before its first use. This seasoning process will not only improve the flavor of your smoked foods‚ but also prolong the life of your new smoker.

Operating Your Masterbuilt Smoker
Operating your Masterbuilt smoker involves using the digital controls to set temperature and time. Adding wood chips will create the desired smoke for your food.
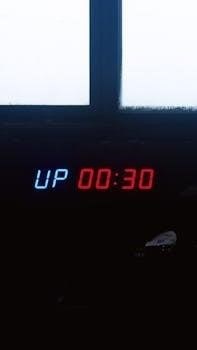
Using the Digital Control Panel
The digital control panel is the heart of your Masterbuilt electric smoker‚ providing precise control over your smoking process. Familiarizing yourself with its functions is key to successful smoking. The panel typically features buttons for power‚ temperature adjustment‚ and timer settings. To begin‚ press the power button to turn on the smoker. You can then use the up and down arrows to select your desired cooking temperature‚ usually ranging from 100°F to 275°F. Next‚ set the cooking time by using the timer controls‚ this can be done in hours and minutes. The digital display shows both the set temperature and the remaining time. Some models may have additional features‚ such as a meat probe for monitoring internal temperatures‚ which can be accessed through the panel. Always ensure the panel is clean and dry‚ and avoid using excessive force on the buttons; These precise controls allow you to maintain consistent temperature throughout the smoking process ensuring even cooking.
Setting Temperature and Time
Accurately setting the temperature and time is crucial for achieving the desired results when using your Masterbuilt electric smoker. Begin by consulting your recipe for the recommended temperature and cooking time for your chosen food. On the digital control panel‚ use the temperature adjustment buttons to increase or decrease the temperature to your target setting. For low and slow cooking‚ temperatures between 225°F and 250°F are generally ideal. For higher temperature cooking‚ you can set the temperature accordingly‚ being mindful of the food you are cooking. Next‚ set the cooking timer using the timer buttons. It’s always advisable to start with the minimum recommended time and check the food’s internal temperature using a meat thermometer to gauge doneness. Remember‚ cooking time can vary based on factors like ambient temperature and the size of the meat. It is always best to set a timer shorter than you think it will take and add time as needed. This will prevent overcooking and allow you to get the perfect result.
Adding Wood Chips and Monitoring Smoke
To infuse your food with that signature smoky flavor‚ adding wood chips to your Masterbuilt smoker is essential. Most models feature a wood chip tray or loader. Add your chosen wood chips according to the manufacturer’s instructions. Do not overfill the tray‚ as this may cause the wood to smolder rather than smoke efficiently. Once the chips have been loaded‚ the smoker will begin to produce smoke. Be sure to monitor the smoke output throughout the cooking process. The ideal smoke is a thin‚ blue-tinged smoke. Thick‚ white smoke indicates that the wood is not burning efficiently and may impart a bitter flavor to the food. Add more wood chips as needed during the cooking process to maintain a consistent smoke level. Avoid adding too many wood chips at one time‚ as this may also produce thick‚ white smoke. Proper monitoring of smoke is key to achieving the best results.

Maintenance and Troubleshooting
Proper maintenance ensures your smoker’s longevity. Regular cleaning and understanding common issues will keep it functioning optimally. Addressing problems promptly prevents further complications.
Cleaning and Storing Your Smoker
Regular cleaning is crucial for maintaining the performance and longevity of your Masterbuilt digital electric smoker. After each use‚ allow the smoker to cool completely before beginning any cleaning procedures. Remove all racks‚ the water pan‚ and the drip tray. Wash these components with warm‚ soapy water. A non-abrasive sponge or brush is ideal for removing any food residue or grease. Avoid using harsh chemicals‚ as these can damage the smoker’s interior and exterior. For stubborn stains or grease build-up‚ a mixture of baking soda and water can be applied and left to sit before scrubbing. Rinse all components thoroughly and allow them to air dry completely before reassembling the smoker. The interior of the smoker can be wiped down with a damp cloth. Ensure the heating element is clean of any ash or debris. When storing your smoker‚ make sure it is completely dry to prevent rust. Store it in a dry‚ covered area‚ away from direct sunlight and moisture. Consider using a smoker cover to further protect it from the elements. This will help to ensure your smoker is ready for use the next time you need it.
Common Issues and Solutions
Even with proper care‚ you might encounter some common issues with your Masterbuilt digital electric smoker. One frequent problem is inconsistent temperature‚ which could be due to a faulty temperature probe or issues with the heating element. Check the probe for any damage and ensure it is properly connected. If the heating element isn’t working‚ you may need to replace it. Another common concern is the smoker not producing enough smoke. This could be due to using damp wood chips or not having the chip tray properly positioned. Make sure your wood chips are dry and the chip tray is close to the heating element. Sometimes‚ the digital control panel might malfunction. Try resetting the smoker by unplugging it for a few minutes and then plugging it back in. If these solutions don’t resolve the issue‚ you may need to contact Masterbuilt customer service. Additionally‚ issues with the door seal can result in heat loss. Inspect the seal regularly and replace it if necessary. Always consult your user manual for specific troubleshooting advice.